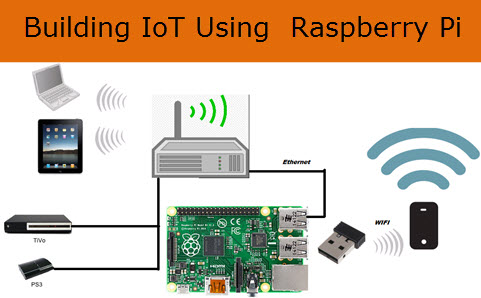
In our increasingly interconnected world, the Internet of Things (IoT) has become an integral part of our daily lives. From smart homes to industrial sensors, IoT devices are transforming how we interact with our environment. As the popularity of Raspberry Pi devices continues to grow, finding a secure and efficient remote access platform has become essential for developers, hobbyists, and businesses alike. The good news? Setting up a free remote IoT monitoring system using a Raspberry Pi is not just possible, but it's also a gateway to a world of possibilities in home automation, remote monitoring, and various IoT projects.
This article explores how you can set up remote IoT monitoring using a Raspberry Pi, providing a free and flexible solution that empowers both hobbyists and professionals alike. Whether you're a DIY enthusiast, a student, a professional looking to optimize your workflow, or even retired and looking to keep your skills sharp, this comprehensive guide will walk you through everything you need to know about harnessing the potential of Raspberry Pi for remote monitoring.
Why Raspberry Pi for Remote IoT Monitoring?
The Raspberry Pi stands out as an excellent choice for remote IoT monitoring due to its versatility, compact size, low power consumption, and affordability. By leveraging the power of Raspberry Pi, you can create a robust monitoring system tailored to your specific needs. It's not just a buzzword; remote IoT monitoring with Raspberry Pi offers an innovative solution to streamline your IoT projects. It provides a powerful yet accessible platform for understanding and controlling your devices from anywhere.
A Raspberry Pi device, powered by its computing capabilities, serves as an excellent solution for monitoring various aspects, from network performance to environmental conditions. It can act as a central hub, allowing you to collect data, analyze it, and even trigger actions remotely. This flexibility makes it an ideal choice for anyone looking to delve into remote monitoring without significant upfront investment.
The Power of Remote Access: SSH and Web Consoles
The cornerstone of free remote IoT monitoring with Raspberry Pi is secure remote access. This is primarily achieved through SSH (Secure Shell) and enhanced by convenient web-based tools.
Securely Connecting from Anywhere with SSH
SSH is a cryptographic network protocol that allows secure remote access to a computer over an unsecured network. With the Raspberry Pi, you can harness the power of SSH to create a secure and efficient setup. This means you can securely connect to your Raspberry Pi from anywhere, ensuring your IoT devices are always under control. Whether you're a hobbyist, a small business owner, or an IT professional, this guide will walk you through setting up a free remote IoT monitoring system using SSH on a Raspberry Pi. This secure connection is vital for maintaining the integrity and privacy of your data and commands.
Web-Based SSH Clients and Control Panels
While direct SSH commands are powerful, web-based SSH clients and control panels offer an even more user-friendly experience. You can access your Raspberry Pi with a web-based SSH client directly in your browser. With the web console, you can connect your Raspberry Pi directly from your PC browser or mobile device, providing unparalleled convenience.
The web console typically functions as a standard terminal emulator, offering a familiar interface for those accustomed to command-line operations. Beyond just a terminal, a comprehensive control panel will provide various options for monitoring and controlling your Raspberry Pi. This includes:
- Viewing system information (CPU usage, memory usage, disk space)
- Executing commands directly
- Accessing the terminal for deeper control
These tools are particularly useful for managing multiple Raspberry Pi devices or for monitoring a single device from a remote location, simplifying complex tasks into intuitive, browser-based interactions.
Setting Up Your Free Remote IoT Monitoring System
Getting started with your Raspberry Pi for remote IoT monitoring is a straightforward process. Here’s a basic outline of the initial steps:
Getting Started with Raspberry Pi OS
- Download Raspberry Pi Imager: First, download the Raspberry Pi Imager tool from the official website. This tool simplifies the process of installing an operating system onto your microSD card.
- Flash Raspberry Pi OS: Use the Imager tool to flash the latest version of Raspberry Pi OS (formerly Raspbian) onto your microSD card. This is the foundation for your monitoring system.
- Initial Boot-up: Once the OS is installed, insert the card into your Raspberry Pi and power it on. Follow the on-screen prompts for initial setup, such as setting your locale and creating a user account.
Enabling SSH
For remote access, SSH must be enabled on your Raspberry Pi. This can be done in a few ways:
- During Imager Setup: The Raspberry Pi Imager now offers an option to enable SSH and set up Wi-Fi credentials before flashing, making the process even easier.
- Via `raspi-config`: After booting, you can access the `raspi-config` tool from the terminal (`sudo raspi-config`), navigate to "Interface Options," and enable SSH.
- Creating an `ssh` file: For a headless setup, you can create an empty file named `ssh` (no extension) in the boot directory of your microSD card before inserting it into the Pi.
Once SSH is enabled, you can use an SSH client on your PC or mobile device to connect to your Raspberry Pi using its IP address and your credentials.
Software Options for Remote Monitoring
There are several software options available for remote monitoring with Raspberry Pi, ranging from simple command-line tools to more sophisticated dashboards. For network monitoring, a Raspberry Pi network monitor can analyze and help you understand how your network is performing and behaving. This process takes advantage of the computing power of the Raspberry Pi to provide valuable insights.
Beyond network monitoring, you can install various Python libraries or open-source monitoring agents to collect data on CPU usage, memory usage, disk space, temperature, and even data from connected sensors (e.g., for environmental monitoring). These tools can then transmit data to a central server or display it on a web interface for remote access.
Practical Applications of Remote IoT Monitoring
The possibilities with free remote IoT monitoring using Raspberry Pi are vast. This setup is perfect for a multitude of applications:
- Home Automation: Control lights, thermostats, and other smart devices from anywhere.
- Environmental Monitoring: Track temperature, humidity, air quality, or soil moisture in your garden or home.
- Running Servers: Host a personal website, a game server, or a media server from your home network, accessible remotely.
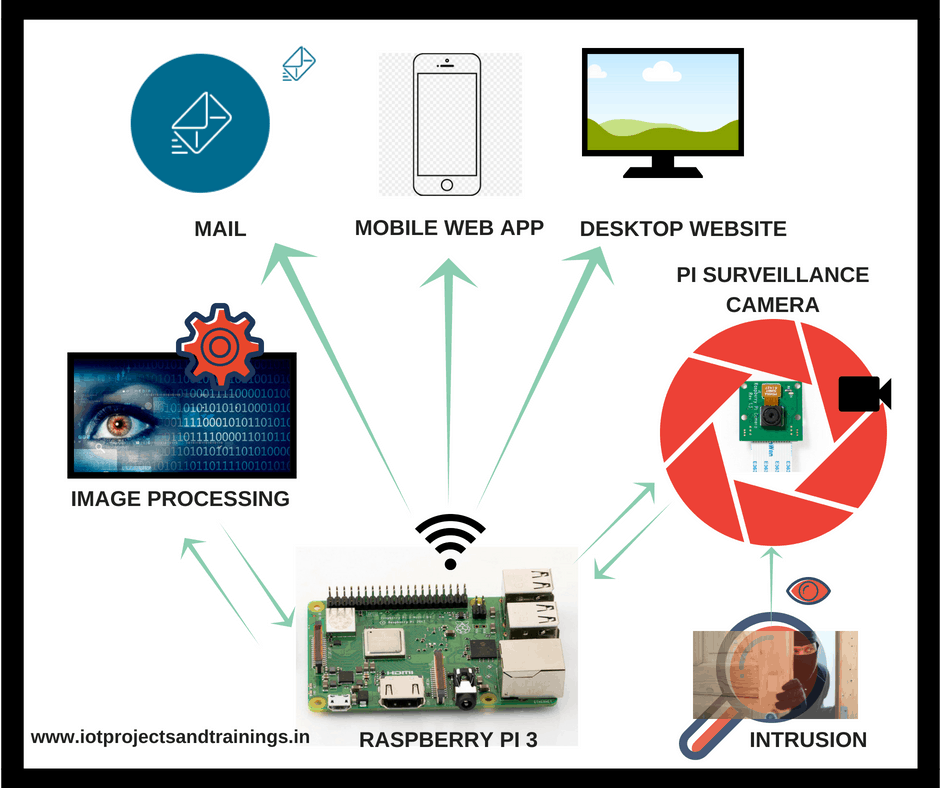
- Security Monitoring: Integrate with cameras or motion sensors to receive alerts and view live feeds.
- Network Performance Analysis: Monitor network traffic, device connectivity, and identify potential issues.
- Industrial IoT: For small-scale applications, monitor machinery status, production counts, or environmental conditions in workshops.
Remotely access Raspberry Pi for free, a comprehensive guide, truly opens up these possibilities. You can access your Raspberry Pi projects from anywhere, giving you ultimate control and peace of mind.
Beyond Monitoring: Mastering Your Raspberry Pi
Setting up remote IoT monitoring is just the beginning. The Raspberry Pi ecosystem encourages continuous learning and development. You can delve deeper into understanding everything about the Raspberry Pi, stop searching for help all the time, and finally enjoy completing your projects. Many users also choose to master Python on Raspberry Pi, as it's the primary language for many IoT projects. With Python, you can create, understand, and improve any Python script for your Raspberry Pi, further customizing your monitoring and control systems. This truly becomes your guide to smart projects.
Who Benefits from This Guide?
This guide is designed for a broad audience, reflecting the Raspberry Pi's universal appeal:
- DIY Enthusiasts: For those who love to build and experiment, the Pi offers endless project opportunities.
- Students: An excellent platform for learning programming, networking, and IoT concepts.
- Professionals: A cost-effective way to prototype IoT solutions, monitor remote infrastructure, or streamline workflows.
- Hobbyists and Small Business Owners: Ideal for creating custom automation or monitoring solutions without significant investment.
- Retired Individuals: A fantastic way to keep skills sharp, engage in new hobbies, and stay connected with technology.
Whether you're looking to monitor a single device from a remote location or manage multiple Raspberry Pi devices, the free remote IoT monitoring solutions discussed here provide the flexibility and control you need.
Conclusion
Remote IoT monitoring with Raspberry Pi is not just a buzzword; it's a practical, accessible, and incredibly powerful solution for anyone looking to connect and control their devices from anywhere. By leveraging the Raspberry Pi's capabilities alongside secure SSH access and user-friendly web consoles, you can create a robust, free, and flexible monitoring system tailored to your unique requirements. This comprehensive guide has walked you through the essentials, from initial setup to understanding the vast applications. Embrace the potential of the Raspberry Pi, and unlock a world of smart projects and seamless remote control.

Detail Author:
- Name : Lou Rippin
- Username : ocie.dicki
- Email : botsford.jeramy@effertz.net
- Birthdate : 1998-08-06
- Address : 2133 Boyer Crossing Garrickburgh, MS 94989
- Phone : 928-745-7230
- Company : Hartmann PLC
- Job : Environmental Engineering Technician
- Bio : Fugit quisquam voluptas at nobis est. Temporibus exercitationem odio quia. Sit necessitatibus officia eos officia ab blanditiis. Asperiores delectus temporibus alias odit.
Socials
linkedin:
- url : https://linkedin.com/in/maymiejaskolski
- username : maymiejaskolski
- bio : Libero explicabo sed corrupti ullam enim.
- followers : 916
- following : 1203
facebook:
- url : https://facebook.com/mjaskolski
- username : mjaskolski
- bio : Soluta iusto esse mollitia accusamus qui sit.
- followers : 1650
- following : 1369
